
For many of us, our phones are now our primary piece of photography equipment. We use them to snap photos, record videos, and share our creations with the world. While most smartphone cameras do a decent job of capturing the moment, it never hurts to know your way around an image-editing app.
You could download a third-party app, but if you have a fairly recent Android phone, you already have access to a cadre of useful editing tools in Android’s built-in Gallery app. These seven useful tricks and tips will help you get the most out of this often overlooked app.
Most of the tools live in the Gallery app’s editing mode. To get to it, open Gallery and navigate to a photo you want to edit. Tap to bring up the toolbars, then tap the Edit button in the lower-left corner—look for the three interlocking circles. Once you do that, you’ll be able to get at various editing tools.
Filter all the photos!
You don’t need to rely on Instagram in order to add filters to your photos—your Android phone already has everything you need.

Navigate to a photo you want to edit, and tap the Edit button in the lower-left corner (again, it’s the one with the three interlocking circles). This takes you directly to the Filters screen, where you can select from nine image filters that will make the photo you took with a modern, state-of-the-art smartphone look like one from 1960 or so.
You can try as many filters as you like. Once you choose the one you want, press the Save button at the upper left and prepare for insta-magic.
Add a border, even
Now that you’ve filtered all your photos, why not take the “old, tattered photo” aesthetic a step further by adding borders, too? Android’s Gallery app comes with 11 borders to choose from, ranging from clean and modern to old and worn.

To get to them, go into editing mode and tap the Borders button in the toolbar—look for a square embedded within another square. Select the border you want and save the image.
You can even apply multiple borders by re-editing a photo you already added a border to—so you can create bespoke, one-of-a-kind images that look like they came straight out of your grandmother’s shoebox full of photos. Tap Save to confirm your changes.
Crop with abandon
If you’re anything like me, your camera roll might be full of otherwise-good photos marred by a stray fingertip in the corner of the shot. Fortunately, your Android phone has a crop tool.
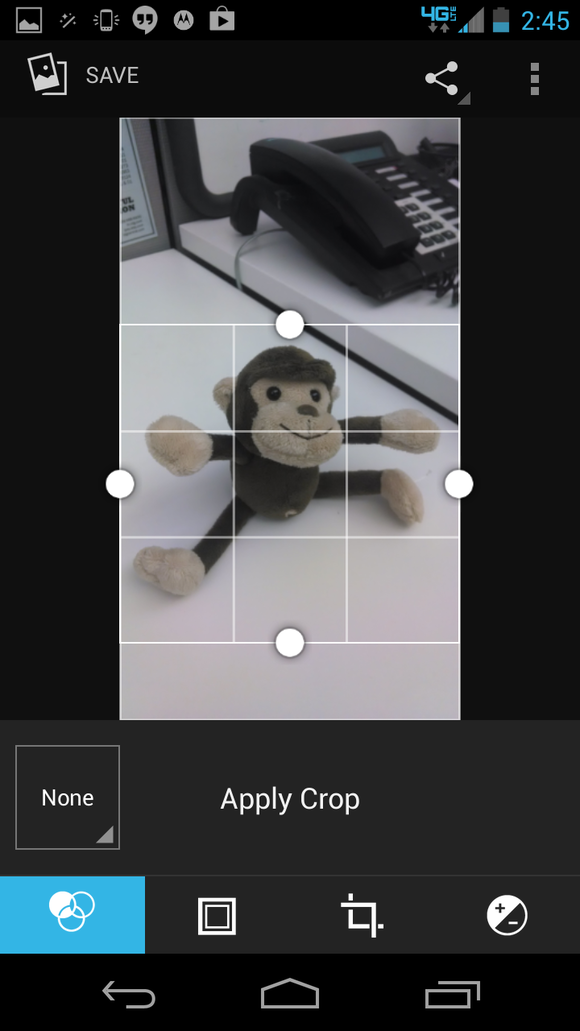
While in Android’s Gallery app, tap the screen to make the toolbars appear. Next, tap the Settings button (the three dots in the upper-right corner) and select Crop from the menu, and you’ll be taken to the Crop screen. (If you’re already in editing mode, you can tap the Crop button in the toolbar—it looks like two L shapes that intersect and make a square.)
You can adjust the area you want to crop by dragging the edges of the white outline box that appears over the photo. If you want to constrain the proportions of the crop area—say, you want the resulting image to have a 4:3 aspect ratio—tap the square in the lower-left corner (by default, it will be labeled None), then select the aspect ratio you want to use.
Tap Apply Crop to crop the photo. If you like what you see, go ahead and tap theSave button.
Straighten and rotate photos
Your photo of the San Francisco skyline came out perfectly...except for the fact it’s at a funky angle. Sound familiar? A perfectly aligned photo is just a few taps away.

While in editing mode, tap the Cropbutton—as indicated by the two interlocking L shapes—and select Straighten from the toolbar that appears. To adjust the photo, swipe your finger up and down until the photo is aligned the way you want it.
Once the photo is to your liking, tapApply Straighten. Note that straightening a photo effectively crops the edges, so you’ll want to make sure that the edges of the photo doesn’t contain anything too important.
To rotate a photo, start from the Crop screen, tap the Rotate button, and swipe your finger on screen in a circular manner. Tap Apply Rotate once you’re done. Then tap Save to confirm your edit.
Tweak color settings
Okay, I get it. Filters aren’t for everyone. Maybe you actually want your photos to look like they came from this century. Android comes with a host of more-advanced tools that let you improve your photos’ color, brightness, exposure, and so on.
Open the editing tools, then tap the Color Adjustments button, represented by a circle with a plus (+) and minus (-) in it. You’ll see a number of different settings to play with here. If you want to let Android adjust your photo’s color for you, selectAutocolor from the list, then tap Apply Autocolor.
If you prefer to tweak settings individually, you can do that, too. Tap the setting you want to adjust from the scrollable list—Exposure, Brightness, Contrast, Vibrance, and so on—and then use the slider to choose the degree to which you want to adjust that attribute. Once you’re happy with how your photo looks, tap the Apply button (the exact label will vary depending on what you’re adjusting).
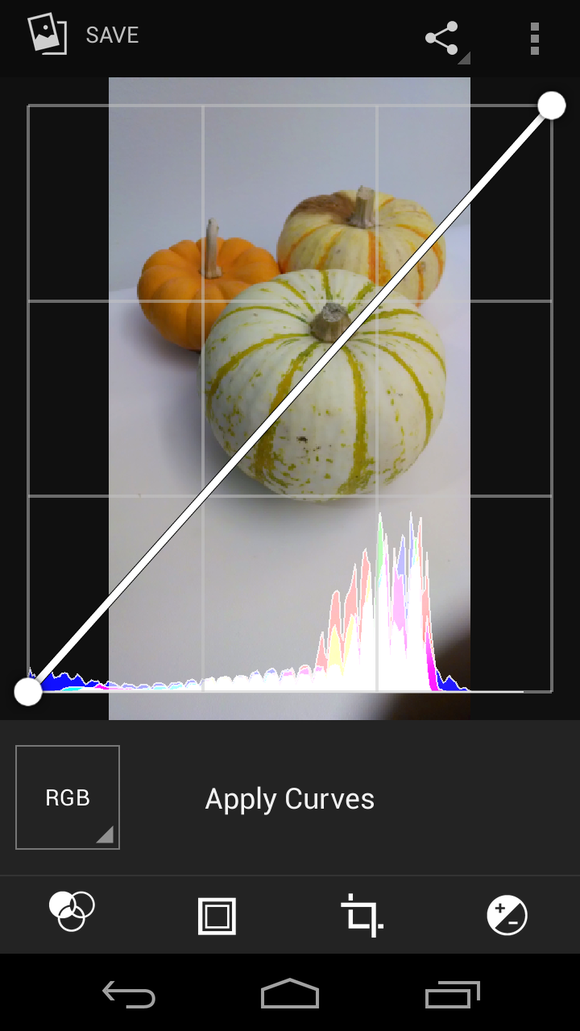
If you’re familiar with adjusting curves levels for your photos, Android lets you do that too. Select Curves from the list, and a curve histogram will appear over your photo. Use your finger to adjust the image curve as you see fit, then tap Apply Curves once you like what you see. Everything look good? Great. Tap Save.
Compare your changes to the previously saved version

Want to see how your changes improve—or degrade—your photo? While in editing mode, swipe your finger up and down or side to side over your photo, and you’ll be treated to a before-and-after view of your photo. Once you’re done, simply lift your finger off the screen.
Undo your changes
Don’t be afraid to play around with Android’s image-editing tools. You can always return to the original version of the photo if you don’t like what you ended up with—so long as you haven’t yet pressed the Save button, that is. At any time while editing a photo, you can go back a step or revert to the last saved version.
While in editing mode, tap the More Settings button (the three dots in the upper-right corner). If you want to go back one step in your edits, tap Undo. If you want to return to the previously saved version of the photo and undo the changes you’ve made since then, tap Reset. To see what changes you’ve made to a photo since your last saved version, tap Show History.
No comments:
Post a Comment